Wednesday, July 29, 2015

Sweet Sisters...


I had to pleasure today of making two signs for two little girls and their adorable rooms.  I met this client back in 2010 at GGA gymnastics.  The oldest girl and my daughter did gymnastics together and actually ended up doing gymnastics together for a couple of years.  I got to know Jami since we spent 2-3 hours a week sitting in a room together staring through a glass wall. We have stayed in semi-touch since then through social media.

Anyway, she contacted me about making some signs to hang above a picture that is special to their family.


Are they not adorable?!  Such a beautiful picture!  They both have this picture hanging above their beds.  My client wanted a sign a little smaller in length than the picture which put us at about 18 inches long - single plank barn wood sign.

If you see the picutre below it shows the oldest girls room - the picture hangs above the bed and then the sign will go on top of the picture.


Mom didn't have too many specs for me other than she really likes the gold accents and she like the arrow and the geo print from my other signs.  

So, I sanded each plank with a 120 grit sand paper to give it a smooth paintable surface.  Then on the older girls sign (bedroom pictured above and the completed sign with the arrow) I did a dry brushing of Old White by Annie Sloan to give it a base.  Then, I use the gold metallic paint I had on hand and did a backing of polka dots.


I stenciled the arrow on with a coral colored paint and then used the stencil I cut to add the lettering.  I mentioned using the dictionary style of a word vs. just the word and she loved the idea!


Once the arrow was dry I placed the stencil and used Welded Iron (grey) to stencil the lettering.  

With the younger daughter sign - she has a pink and green room.  Green's are hard.  I feel like there are a million different shades.  I know its the same for any other color - but to me greens are hard.  So, I wanted to stay away from the green because I was worried about matching the color.  I wanted to use the gold again because mom really likes it.  

I took the sanded plank and did a dry brush paint coat of the Welded Iron (grey).  Then used the gold paint to stencil the geo print on each side.  Then used the same stencil to place the lettering.  I used pink for the "Sis-ter" and Old White for the remaining lettering.  

I think they will both go great in their rooms - and you know I love things with meaning - it's the sappy side of me - so I hope one day these two girls have that picture with the sign above it hanging in their own homes.  That would be pretty cool. :)


So, after the signs - It was time to start sanding the buffet I mentioned yesterday.  I got it out there and started and what happended??  It started thundering.  When you have someone else's furniture outside and it starts thundering - YOU TAKE IT INSIDE.  Hahaha!  I am here to improve people's pieces - not ruin them.  (I have sat at a gas station under the overhang for 45 minutes before to save furniture while I waited out the monsoon)  So, I only got about half of the buffet sanded today thanks to mother nature.

That is all from this Gingered Peach for today - check back for the updates on the dining set through out next week!

-Julie


Tuesday, July 28, 2015

Signs, signs and more signs...

Today was a super busy day at TGP!  I had items to get done for my booth - and I had the delivery of the church pew and chest I did earlier this week.

I ended up making 6 signs today - 5 for my booth and 1 to give to my mom's charity group for their silent auction - check out their flyer if you wanna take a look at their charity week info - they support some great causes! 

The signs I made today are made out of the barn wood I have on hand.  I spent most of the morning cutting and sanding planks of wood to get ready for painting.  I went with the "love" and "laugh" sayings - the love seems to be very popular and laugh is one of my favorites...I have it in several places in my house.  How was you be sad, mad, or in a bad mood if you're laughing?!

Then, I can't make a group of signs without including some UGA signs - who doesn't love a good "Go Dawgs" sign- and they have been a top seller in my booth. 

Here are the signs  I made today - they are already in my booth at Queen of Hearts in Buford.


This evening I delivered the church pew and chest I did earlier in the week.  My client LOVED them!  I was so happy.  She is so funny - I didn't send her any pictures of them on purpose because I wanted her to be surprised.  I knew she didn't have any social media accounts so I *thought* I was safe to post.  Her husband told me tonight she went and Googled me and pulled TGP up on facebook (since my site is public anyone can see it) and she saw the pictures.  But, she said it was even better in person (which I agree with her - and that is why I am weary to post or send pictures.)  

Both pieces went so well in her beautiful home.  One thing I have enjoyed about this venture is meeting new people and reconnecting with old friends.  I have had several of my clients that I was friends with in high school or college - and it is great to reconnect.  And, as always, I appreciate your business!  

Below are the pictures of the pew and chest in my clients home.  


Tomorrow, I will start on the buffet I picked up Monday evening - this piece is so beautiful - so with a new stain job on top and painted on the bottom - it is going to be a knock out!  Below is the buffet I am starting tomorrow....I am excited about this piece because I will be waxing the handles with a silver wax I picked up from Chalk it Up!  Can't wait to see the results!


Until tomorrow,

-Julie
  

Monday, July 27, 2015

No custom pieces...what!?


Today was the first day in a while I didn't have a custom piece to work on - don't worry - I picked up a full dining room set today :)

No custom pieces means work on pieces for my booth at Queen of Hearts in Buford, Ga.  So, I have plenty of items waiting for me in my garage.  I picked a dresser I got from ReStore in Athens a month or so ago.  


The dresser wasn't too terribly bad looking - but it needed some work structurally.  The owner before had screwed huge screws all up each side of the dresser.  I knew those had to come out.  But, the screws left giant holes.  So, I took the screws out, used my nail gun (this thing never gets old!) to reinforce the dresser, then patched all the holes up.  Once the wood filler was dry I sanded down where I puttied with 120 grit sand paper to leave a smooth finish.


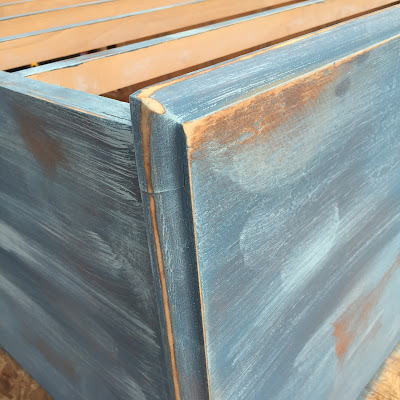
Once the repair was complete - I painted the piece with just 1 coat of Aubusson Blue by Annie Sloan.  This was a new color I got today at Chalk it Up in Buford. 


The reason I only did 1 coat of base paint was because I wanted to distress this piece a little more than normal to add variety to my booth.  With only 1 coat of base paint it allows for easier and faster distressing.  After the 1 base coat I did dry brushing of Duck Egg Blue.  I mentioned dry brushing in my previous post about the living room pieces.


Once the dry brush layer of Duck Egg was on - I took my orbital sander and went to town!  There is no rhyme or reason to distressing - just start and see where it goes! 


Once the sanding was done it was time to wax it.  I just did Annie Sloan's clear wax on this piece since the painting was so decorative.  

Lastly, I added new knobs.  Knobs are always a game changer for me.  It can make or break a piece.  Some must stay and some MUST go.  :)

I got the knobs from Hobby Lobby - which I may add is one of the worst decisions I have to make.  I have been in the knob aisle of Hobby Lobby for what seems like hours trying to make a decision.  I usually try to bring one of the drawers with me to "test" it.  If I don't have the drawer with me - forget it...I'll be there forever!!  

I put the new knobs on - and the piece was complete!  It will be headed to Queen of Hearts tomorrow for be put up for sale!  Come see me there in the Peach booth which is on the "Court" aisle!! 


Tomorrow I will be starting on the full dining set I picked up tonight - and also making some signs.  I had 3 of them go today from Queen and my walls are BARE!  Yikes!  Thank you to whoever bought all of those signs - I already called my mother....it wasn't her! ;)

-Julie


Sunday, July 26, 2015

The Lane chest


The same client who had me redo the old church pew also had this Lane chest from when she was younger and wanted it updated.  It needed it - this must have been redone in the early 2000's originally.  I remember we bought our first house in 2004 - and these red's, gold's, and dark green's were so popular then.  My whole house was covered in these three colors!  Brings me back!  Anyway, they are not such "hot" colors anymore and this piece needed an update.

The room that houses this chest is a very shabby chic type room.  The bedding is white and light blue and walls tan.  When I was at the consult and determining our path for this piece I noticed a burlap pillow on the bed.  That is where I got the inspiration for the piece.  I suggested recovering the seat of the chest in burlap - and she loved the idea!  And of course what is the most shabby chic color - Duck Egg Blue!  :)

So my first step was to cover the gold color that the chest was originally painted.  I knew I would want to distress the piece slightly and I didn't want the gold to be what showed through the scuffing. 

So, the chest was giving a 2 coat base of Old White by Annie Sloan


Next, I painted 1 coat of Duck Egg Blue by Annie Sloan - I wanted to achieve a more antique look by allowing some of the white to shine through so I only did one coat of the Duck Egg.  


Once the piece was dry I just scuffed it up a tad.  I didn't want to go too crazy with this piece as the room isn't on shabby chic overload - just needed enough.  


As you can see I just hit the edges for this piece.  You can actually see a little bit of the gold shine through - but it actually gives the piece some dimension and pulls in the burlap color.

Once the scuffing was complete I clear waxed the piece and let it be to set.

While the wax was setting - I went ahead and spray painted the faux handles for the front of the chest - I did this in a brown bronze color - I wanted the hardware to still pop.


Notice around the hardware - I antiqued it a little bit using dark wax.  This again, adds dimension to the piece.  

I now had to reupholster the seat to the chest.  This was pretty straight forward - just think of it like a Christmas gift - wrap and tape....but in this case use a staple gun :)

Once I had the seat reupholstered I screwed it back on to the top and the piece is complete!  


I am taking these pieces to my client Tuesday - I will update you on how the pieces look when placed.

-Julie

Saturday, July 25, 2015

Duck Egg Blue living room set

Today, I worked on several projects - trying to play catch from being at the beach - back to reality!  One of the projects I worked on was one for my booth at Queen of Hearts in Buford, Georgia.  I obtained a 2 end table and 1 coffee table set.  I decided that I wanted to use Duck Egg Blue as the base for these pieces, as that is the most popular color I have come to find out - and I love it just as equally :)

First, a 2 coats of Duck Egg Blue were applied - this is what I call my base coat - more like making the piece a blank slate for me to start creating the look.  The pieces looked like this once the base coats were applied....


I decided I wanted to do a dry brushing of Annie Sloan's Old White to the piece.  When you do the dry brushing technique you have little paint on your brush to create a transparent finish over the base color.  I usually have a spare piece of wood near by so once I lightly dip my brush in the paint I was blot the brush a few times to make sure I can achieve the right look.  In the pictures below shows the brush looks like before I start applying the dry brush technique and then me applying the dry brush paint.


The finished technique is shown below.  With this techique you have to be careful with your strokes so it is very visible.  I typically follow the natural flow of the way the piece is going.  The picture below shows the top of the end table dry brushed.
 

After the Old White dried I distressed the piece with 120 grit sand paper - this is really up to your discretion on how much distressing to do.  I usually just start and see where it goes!  :)

Once the piece was distressed I clear waxed the piece with Annie Sloan clear wax.


Then, I sprayed the hardware and attached it back on and the piece was DONE!  :)  The final piece is below.  


Thursday, July 23, 2015

The "washed in the blood of the Lamb" pew...

The first project I am sharing with everyone is the 2nd Ponce de Leon Baptist pew I had to pleasure of updating.  You can read a little history on this church here...but in a nutshell this pew is around 100 years old and in GREAT condition I may add. 

The pew came to me looking like this....


The plan with the owner was she wanted it refinished (which means sanded and stained).  After talking at our consult I convinced her to do a paint/stain mix.  This is always my favorite as it gives the piece so much more dimension and fills the space.  By the end of the consult she basically told me to go for it - which is where I feel like I do my best work - I've never liked restrictions :)

First step was to sand the spaces where I was going to stain.  I decided to sand the seat and the seat back.  Let me tell you - this took me ALL DAY!  Literally.  To my surprise the seat of this pew seemed to be "washed in the blood of the lamb."  No, but really.  Blood red stain was what I found under 2 layers of paint (one being white and one being gold).  I use a 60 grit sand paper to get the paint off then go back with a 120 grit to give it a smooth finish.  You can see the layers in the picture below.


So, I finally get it sanded - and let me tell you I was NASTY!  I am typically not this yellow....


So, once sanded it was time to stain.  This is where the biggest issue came about.  I decided to stain the seat and seat back Special Walnut by Minwax.  But, because the seat was originally red - the red stain kept sneaking back up through the new stain.  The seat and the seat back were two different colors; as you see in the picture below.  I stood there and just stared at it for a bit...wondering what am I going to do.  


I was also semi frustrated I spent the whole day sanding the seat down for this to happen.  So, I thought and thought and came up with a game plan.  I have no other choice than to paint the seat the same color as I picked for the base of the pew.  I still wasn't totally sold though.  I thought it would look so random to just have the seat back stained.  So, noticing the sides of the pew were pretty open I decided to hit up the local craft store (Hobby Lobby) and find a nice wooden plate and  medallion that I could stain to match the seat back so it would all flow better. 

With the new plan in place I continued with the piece.  I painted the base with Annie Sloan's CoCo chalk paint.  Once the base was painted with two coats of the chalk paint it was time to place the wooden plate and medallion.  I knew I wanted to dark wax the piece and since the medallion was being painted in CoCo I went ahead and dark waxed the medallion to match.  Then, I stained the wooden plate in Special Walnut and used my new air compressor nail gun to attach the side pieces to the pew.  

Once the side pieces were on - I had the task of dark waxing the entire piece.  What a difference dark wax makes!  It requires some elbow grease - but totally worth it!!  The dark wax gets in to the grooves of the piece and gives it that added sense of antiquing and depth.  I then clear waxed the stained seat back and finally it was complete!

The crisis was over - and the pew turned out awesome.  Can't wait for delivery of this piece to my client.  I will post pictures of the pew placed in the clients home soon!  

The completed piece:


Any questions?  Let me know!  

-Julie


Welcome to The Gingered Peach (TGP)!!

Welcome to another new venture I am trying...a blog.  I have started a furniture refinishing business recently that has been very good to me thus far.  Along with orders I get from clients, I also get a lot of questions from people wanting to redo their own furniture.  It was suggested to me that I should start a blog.  So, here I am - giving it a whirl.  This will be a place where I can show my work and give better explanations of what I do to each piece.  This way - those who are wanting to learn - can learn -- but feel free to allow me to redo your furniture if you don't want to redo it yourself :)

How did this all get started?

  Well, like most careers (that people actually love to do) it started as a hobby.  The first piece I ever redid was my younger sister's nursery dresser that my dad made back in the mid 1980's.  Then I would do a few pieces at a time here and there.  Then in a few years ago my sweet Gramma passed away and I inherited several pieces of her furniture.  I wanted to use it in my home because it meant so much to me.  So, I decided to start updating it all. 


Before, TGP (The Gingered Peach), I was a 12th grade Economics resource teacher in the Special Education department at Mountain View High School.  I was also the JV football cheerleading coach and one of the Varsity basketball cheerleading coach.  This kept me very busy as I don't usually just put my toes in first - I tend to canonball fully clothed into everything I do.  I ended up working more than I had originally wanted and I have two kids who needed me at home and at their sporting events we made the decision for me to stay at home.  They are both in grade school so I wanted something to do during the day or I would drive us into bankruptcy :).  So, that is how TGP got started!
I have had way more success right off the bat than I ever thought.  I want to thank all my clients who have rendered my services thus far and future clients.  I have had so much support from friends giving my old furniture, to notices of garages sales, and even actually helping me paint.  I appreciate all this more than you know!

-Julie